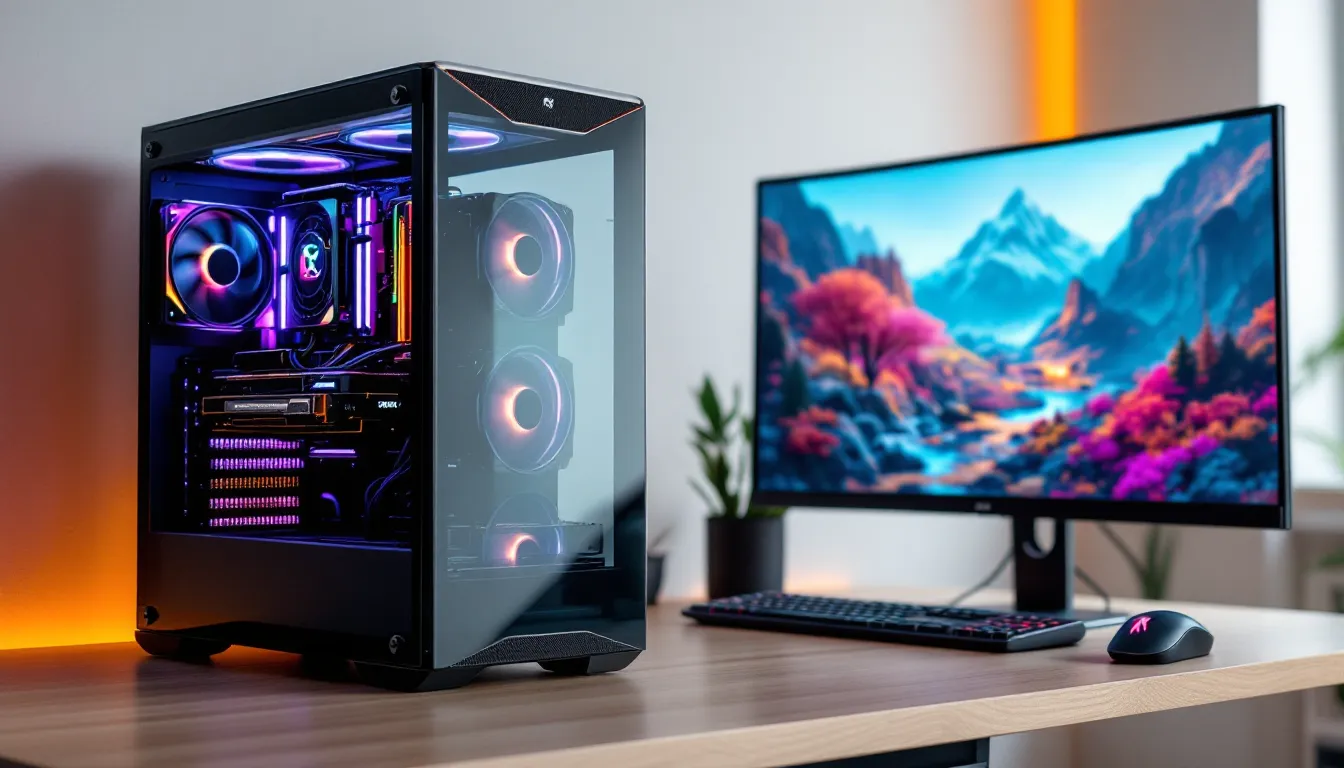

Building a gaming PC in 2026 doesn’t mean you need to drop three grand to enjoy high-refresh gameplay and maxed-out settings. The $1200 price point has become the goldilocks zone where smart component choices deliver framerates that’ll satisfy even competitive players without requiring a second mortgage.
This sweet spot exists because of how the hardware market has evolved. AMD and Intel are locked in fierce competition at the mid-range, GPU prices have normalized after years of crypto-induced chaos, and DDR5 memory has finally hit reasonable pricing. The result? A $1200 build today outperforms what $2000 bought you just three years ago.
This guide walks through every component decision, explains the performance trade-offs, and shows exactly what framerates to expect across popular titles. Whether this is your first build or you’re upgrading from an aging rig, you’ll know precisely where every dollar goes and why.
Key Takeaways
- A $1200 gaming PC hits the performance-per-dollar sweet spot, delivering 90% of high-end gaming performance while avoiding diminishing returns that come with significantly higher budgets.
- The GPU should consume the largest portion of your budget ($450-550), with the RX 7700 XT and RTX 4060 Ti offering the best value for 1440p gaming at this price point.
- Pair your graphics card with either the AMD Ryzen 5 7600X or Intel Core i5-14400F CPU ($190-230), avoiding the temptation to overspend on processors that deliver only marginal gaming gains.
- Never compromise on power supply quality, cooling solutions, and SSD speed—these components prevent costly failures and thermal throttling that undermine gaming performance.
- A properly configured $1200 gaming PC crushes 1080p ultra settings (100-500+ FPS in competitive titles) and handles 1440p smoothly (60+ FPS in AAA games) with smart upscaling and setting adjustments.
- Your build supports clear upgrade paths through 2028-2030 with PCIe 4.0, DDR5, and NVMe Gen4 standards, making future GPU and storage expansions painless and cost-effective.
Why $1200 Is the Sweet Spot for Gaming PCs in 2026
The $1200 budget hits a performance-per-dollar peak that’s hard to beat. Go lower, and you’re making compromises that hurt gaming experience, slower storage, weaker GPUs that struggle at 1440p, or CPUs that bottleneck in CPU-bound titles like Baldur’s Gate 3 or competitive shooters.
Push significantly higher, and you’re entering diminishing returns territory. That extra $500-800 might net you 15-20% more performance, but the $1200 range gets you 90% of the way there. You’re looking at hardware that handles 1080p ultra settings with ease and tackles 1440p gaming in most titles without breaking a sweat.
Component availability matters too. At this price point, you’re shopping in the most competitive segment where manufacturers actually fight for your dollar. Mid-range GPUs like the RTX 4060 Ti or AMD’s RX 7700 XT sit here, CPUs like the Ryzen 5 7600X or Intel Core i5-14400F deliver strong gaming performance, and you can afford quality peripherals like a proper PSU that won’t fry your components.
The $1200 budget also leaves room for smart allocation. You’re not forced to cheap out on the power supply or skimp on cooling, which are the mistakes that come back to haunt builders within the first year.
Complete $1200 Gaming PC Build Guide: Component Breakdown
Choosing the Right CPU: Performance Without Overspending
The CPU decision comes down to two solid options in this budget: the AMD Ryzen 5 7600X (around $210-230) or the Intel Core i5-14400F (around $190-210). Both deliver exceptional gaming performance, but they handle it differently.
The Ryzen 5 7600X brings 6 cores and 12 threads with a base clock of 4.7GHz that boosts to 5.3GHz. It dominates in single-threaded performance, which translates directly to higher FPS in most games. The 14400F counters with 10 cores (6 P-cores, 4 E-cores) and runs slightly cooler out of the box.
For pure gaming, the 7600X edges ahead by 5-8% in most titles. If you’re also streaming or running background applications while gaming, the 14400F’s extra cores help maintain stable framerates. Either choice leaves enough budget for a strong GPU, which matters more for gaming than an extra $100 on the CPU.
Avoid the temptation to jump to a Ryzen 7 or Core i7 in this build. That $100-150 difference delivers maybe 3-5% gaming gains but could’ve bought you a GPU tier upgrade instead, which would net 20-30% more FPS.
Graphics Card Selection: The Heart of Your Gaming Experience
Your GPU eats the biggest chunk of this budget, and it should. Allocate $450-550 here, which lands you in the RTX 4060 Ti 8GB ($430-480) or AMD RX 7700 XT ($420-470) territory.
The RX 7700 XT is the value king in this range. With 12GB VRAM and stronger rasterization performance, it pulls ahead in most non-ray-traced titles. According to hardware performance testing, the 7700 XT delivers about 15-18% more FPS than the 4060 Ti at 1440p in games like Cyberpunk 2077 (FSR enabled), Resident Evil 4 Remake, and Starfield.
The RTX 4060 Ti fights back with superior ray tracing and DLSS 3.5, which matters if you’re playing newer AAA titles that support it. Games like Alan Wake 2 or Hogwarts Legacy with ray tracing enabled run noticeably smoother with DLSS than FSR, sometimes 20-30 FPS difference at 1440p.
VRAM consideration: That 8GB on the 4060 Ti is already showing limitations in texture-heavy games at ultra settings. The 7700 XT’s 12GB provides more headroom for future titles. If you’re planning to keep this card for 3+ years, the extra VRAM matters.
Motherboard and RAM: Balancing Features and Budget
Motherboard choice depends on your CPU. For the Ryzen 7600X, grab a B650 motherboard ($130-160) like the MSI B650 GAMING PLUS WIFI or ASRock B650M Pro RS. You don’t need X670, the extra features won’t improve gaming performance.
For Intel’s 14400F, a B760 board ($120-150) handles everything you need. The MSI PRO B760M-A WIFI or ASUS TUF Gaming B760M-PLUS both deliver solid VRM cooling and enough connectivity without wasted features.
RAM allocation is straightforward: 32GB DDR5-6000 ($95-115) for AMD builds or DDR5-5600 ($90-105) for Intel. The Ryzen platform benefits more from faster RAM speeds due to its Infinity Fabric architecture. Intel sees smaller gains above 5600MHz, so save the $10-15.
Don’t fall for RGB RAM that costs $30 more for the same specs. That money belongs in your GPU budget. Brands like Corsair Vengeance, G.Skill Flare X5, or TeamGroup deliver identical performance without the lighting tax.
Storage Solutions: Speed Meets Capacity
Storage is non-negotiable: grab a 1TB NVMe Gen4 SSD ($70-90) as your primary drive. The WD Black SN770, Samsung 980 Pro, or Crucial P3 Plus all deliver read speeds above 5000MB/s, which means sub-5-second load times in most modern games.
Some builders try to stretch budget with Gen3 drives, but the $15-20 savings isn’t worth it. Games like Final Fantasy XVI, Forspoken, and Ratchet & Clank: Rift Apart on PC explicitly benefit from Gen4 speeds with DirectStorage implementation.
If you need more capacity immediately, add a 2TB SATA SSD ($80-100) as secondary storage for older games that don’t benefit from NVMe speeds. Most modern cases support at least two 2.5″ drive bays. Alternatively, save the $80 now and add storage later, it’s the easiest upgrade you’ll ever make.
Skip mechanical HDDs entirely unless you’re archiving gameplay footage. The noise and load times aren’t worth the cost savings in 2026.
Power Supply and Cooling: Don’t Cut Corners Here
The power supply is where budget builders hurt themselves. You need a quality 650W-750W 80+ Gold unit ($80-110), period. The Corsair RM750e, EVGA SuperNOVA 750 GT, or Thermaltake Toughpower GF1 all provide clean power with 10-year warranties.
Comprehensive gaming hardware analysis shows that cheap PSUs are the leading cause of random shutdowns, component damage, and system instability. That $50 you saved on a bronze-rated no-name unit could brick a $450 GPU.
For cooling, the decision splits by CPU. The Ryzen 7600X runs hot under load (especially with PBO enabled) and benefits from a tower cooler ($35-50) like the Thermalright Peerless Assassin 120 SE or DeepCool AK620. These match or beat many 240mm AIOs for less money and zero pump failure risk.
The Intel 14400F runs cooler and handles a quality budget tower ($25-35) like the ID-COOLING SE-224-XT or Arctic Freezer 34 eSports. Intel’s stock cooler technically works but sounds like a jet engine under load, spend the $25.
Case Selection: Function Meets Form
Case choice affects thermals and build experience more than aesthetics. Allocate $60-90 for something with good airflow and cable management space. The Phanteks Eclipse G360A, Lian Li LANCOOL 205 Mesh, or Fractal Design Pop Air all deliver excellent ventilation with tempered glass panels.
Key features to verify:
- Mesh front panel: Solid fronts strangle airflow. If you can’t see through it, your temps will suffer.
- PSU shroud: Hides cables and improves appearance without cable management torture.
- At least 2 included fans: You’ll want 3-4 total (2-3 intake, 1 exhaust) for optimal cooling.
- GPU clearance: Most mid-towers handle cards up to 320-330mm, but verify against your GPU choice.
RGB and tempered glass are fine if they’re included, but don’t pay a premium for them. Your FPS counter doesn’t care what the case looks like.
Performance Expectations: What Games Can You Run?
1080p Gaming Performance
At 1080p, this build demolishes everything. Expect these framerates with settings maxed (no ray tracing):
Competitive/Esports Titles:
- Counter-Strike 2: 300-400+ FPS
- Valorant: 400-500+ FPS
- Apex Legends: 200-250 FPS
- Fortnite: 240-300 FPS
- Overwatch 2: 280-350 FPS
AAA Single-Player:
- Cyberpunk 2077 (Ultra, no RT): 90-110 FPS
- Hogwarts Legacy: 110-130 FPS
- Red Dead Redemption 2: 80-95 FPS
- Baldur’s Gate 3: 100-120 FPS (120-140 in combat)
- Starfield: 80-100 FPS
Enable ray tracing in demanding titles and expect framerates to drop 40-50%, but DLSS/FSR brings most games back above 60 FPS. The RX 7700 XT particularly shines here, recent gaming hardware reviews show it maintaining 1% lows above 60 FPS in 95% of tested games at 1080p ultra.
You’re not just hitting 60 FPS: you’re crushing refresh rates on 144Hz or 165Hz monitors. This matters for competitive advantage in shooters and MOBAs where frame timing directly impacts input response.
1440p Gaming Capabilities
The $1200 build handles 1440p better than many expect, though you’ll adjust settings in the most demanding titles.
High-Refresh Capable (100+ FPS):
- Doom Eternal: 140-165 FPS
- Rainbow Six Siege: 180-220 FPS
- Halo Infinite: 110-130 FPS
- The Finals: 100-130 FPS
Smooth 60+ FPS (AAA titles, high-ultra settings):
- Cyberpunk 2077 (High, FSR Quality): 75-85 FPS
- Hogwarts Legacy: 70-85 FPS
- Remnant 2: 65-80 FPS
- Alan Wake 2 (Medium-High, FSR): 60-75 FPS
The key at 1440p is understanding when to compromise. Ultra settings often include performance-killing options that provide minimal visual improvement. Dropping from Ultra to High typically recovers 15-20 FPS with barely noticeable quality loss.
Upscaling technologies (DLSS/FSR) are your friends here. FSR Quality mode on the 7700 XT or DLSS Quality on the 4060 Ti provides nearly identical image quality to native while boosting performance 30-40%. Some purists hate upscaling, but modern implementations are excellent, the performance gain justifies any minimal softness.
Build Assembly Tips for First-Time Builders
First builds aren’t as scary as YouTube makes them look, but a few steps trip up newcomers every time.
Pre-build preparation:
- Install the I/O shield before the motherboard goes in. Forget this, and you’re removing the board later.
- Install M.2 drives before mounting the motherboard. It’s infinitely easier than wrestling with tiny screws inside a cramped case.
- Install CPU, RAM, and CPU cooler backplate on the motherboard while it’s outside the case if possible.
Assembly order that actually works:
- Install PSU in case (fan down if there’s a bottom vent)
- Install I/O shield
- Mount motherboard standoffs (most cases have these pre-installed)
- Install motherboard, screw in gently (don’t overtighten)
- Connect front panel headers (power button, USB, audio), check the motherboard manual diagram
- Install GPU after everything else is done: gives you room to work
Cable management reality check: Your first build won’t look like a YouTube showcase, and that’s fine. Focus on keeping cables away from fans and ensuring good airflow. Use the cable management space behind the motherboard tray, that’s what it’s for. Zip ties are your friend.
Common first-time mistakes:
- Forgetting to flip the PSU switch before panicking that nothing powers on
- Not seating RAM completely (push until it clicks on both sides)
- Plugging monitor into motherboard HDMI instead of GPU (no video output if you do this)
- Over-applying thermal paste (a rice grain-sized amount is plenty)
Test boot outside the case before full assembly if you’re nervous. Install just CPU, one RAM stick, and GPU with the PSU connected. If it posts to BIOS, you’re golden.
Money-Saving Strategies Without Sacrificing Performance
Several strategies stretch the budget without compromising gaming performance.
Component timing matters: GPU and CPU prices fluctuate monthly. Sites like PCPartPicker show price history, wait for a $30-50 dip if you’re not in a rush. Black Friday, Prime Day, and back-to-school sales (August-September) typically see 10-15% discounts on key components.
Open-box and refurbished options: Retailers like Micro Center, Newegg, and Amazon Warehouse offer open-box motherboards and cases at 15-25% off. These are often customer returns with zero issues, just missing the plastic wrap. GPUs and CPUs are riskier used but fine from retailers with return policies.
Bundle deals: Micro Center frequently bundles CPUs with motherboards for $20-50 off combined pricing. If you’re near a location, this alone saves enough for a RAM upgrade. Online retailers occasionally bundle RAM with motherboards during sales events.
Where to actually save:
- Case: $60 case performs identically to $120 options if airflow is comparable
- RGB: Skip entirely or add later: zero performance impact
- Windows license: OEM keys run $20-30 from authorized resellers versus $139 retail (or run unactivated with a watermark)
- Peripherals: Your existing keyboard/mouse work fine initially
Never sacrifice these to save money:
- Power supply quality (cheap PSUs kill components)
- GPU tier (this is your gaming performance)
- SSD speed (Gen4 NVMe is mandatory in 2026)
- CPU cooling (thermal throttling kills performance)
The $40 saved on a worse PSU could cost $500 in damaged components. The $30 saved on a stock cooler means your CPU thermal throttles under load, negating any savings.
Future Upgrade Paths for Your $1200 Build
Smart component choices now make future upgrades painless and cost-effective.
GPU upgrade (easiest, biggest impact): This will likely be your first upgrade in 2-3 years. Both the B650 and B760 motherboards support PCIe 4.0, so any next-gen GPU drops right in. The 650-750W PSU handles even high-end cards like the RTX 5080 or RX 8800 XT. No other components need changing.
CPU upgrade path: The AM5 platform (Ryzen) receives support through 2027+ with multiple CPU generations using the same socket. You can drop in a Ryzen 7 9700X or even a Ryzen 9 down the line. Intel’s LGA1700 socket is nearing end-of-life, but the 14400F has enough headroom that CPU won’t bottleneck mid-range GPUs for years.
RAM expansion: 32GB handles everything now, but if future titles demand more (unlikely before 2028-29), both platforms support up to 128GB. Just buy another matching kit. Enable XMP/EXPO in BIOS to ensure both kits run at rated speeds.
Storage additions: Every motherboard in this price range includes at least one additional M.2 slot. Future 2TB Gen4 drives will be under $100 within a year. SATA ports handle additional SSDs for game libraries that don’t need NVMe speed.
Upgrade priority by year:
- Year 1-2: Add storage if needed, maybe a better CPU cooler if you want quieter operation
- Year 2-3: GPU upgrade delivers the most noticeable performance jump
- Year 3-4: CPU upgrade if newer titles start showing bottlenecks (unlikely with these choices)
- Year 4+: Consider platform upgrade (new motherboard, CPU, RAM together)
The beauty of this build is that you’re not locked into immediate obsolescence. Every component supports current standards (PCIe 4.0, DDR5, NVMe Gen4) that’ll remain relevant through 2028-2030.
Common Mistakes to Avoid When Building a $1200 Gaming PC
Builders at this budget repeatedly make the same allocation errors that hurt gaming performance.
Mistake #1: Overspending on CPU, underspending on GPU. The temptation to grab a Ryzen 7 7800X3D or Core i7 is strong, but that extra $150-200 on the CPU nets maybe 5% better gaming performance. Move that budget to the GPU for a 25-30% FPS increase instead. The 7600X or 14400F won’t bottleneck any GPU in this price range.
Mistake #2: Cheaping out on the PSU. That $45 no-name 600W bronze unit might power the system, but it delivers dirty power with voltage fluctuations that cause crashes, reduce component lifespan, and sometimes catastrophically fail. The $60 quality difference is insurance for $1200 worth of components.
Mistake #3: Ignoring motherboard VRM quality. Not all B650 or B760 boards are equal. Weak VRM cooling causes thermal throttling under sustained loads, reducing performance. Check reviews, boards with heatsinks on VRMs and at least 8-phase power delivery handle modern CPUs without throttling.
Mistake #4: Buying slow RAM. DDR5-4800 costs the same as 6000MHz but performs 8-12% worse in gaming on Ryzen systems. Always verify speed, the price difference is negligible, but the performance gap isn’t.
Mistake #5: Single-channel RAM configuration. Buying one 32GB stick instead of 2x16GB cuts memory bandwidth in half, causing 15-25% FPS loss in memory-sensitive games. Always run dual-channel (two matching sticks).
Mistake #6: Ignoring case airflow. That beautiful solid-front panel case looks amazing but traps heat, causing thermal throttling. Performance drops 10-15% when your GPU hits 85°C+ compared to a properly cooled 70-75°C. Mesh front panels aren’t optional in 2026.
Mistake #7: Skipping BIOS updates. New motherboards sometimes ship with older BIOS versions that cause stability issues with DDR5 or miss performance optimizations. Update immediately after building, before installing Windows.
Avoid these seven mistakes and your $1200 build will perform exactly as expected without the troubleshooting frustration that plagues budget builds in forums.
Conclusion
A $1200 gaming PC in 2026 delivers performance that seemed impossible at this price point just a few years ago. The combination of AMD’s Ryzen 5 7600X or Intel’s Core i5-14400F with an RX 7700 XT or RTX 4060 Ti crushes 1080p gaming and handles 1440p in most titles without compromise.
The key is smart allocation: prioritize the GPU, don’t cheap out on the PSU or cooling, and avoid the temptation to overspend on CPU when that budget belongs elsewhere. The builds outlined here provide clear upgrade paths and won’t leave you needing a complete overhaul in two years.
Building your own PC at this budget isn’t just about saving money compared to prebuilts, it’s about understanding exactly what you’re getting, choosing components that match your specific needs, and having the knowledge to upgrade intelligently down the line. The framerates you’ll get from this investment will keep you competitive and immersed for years.