
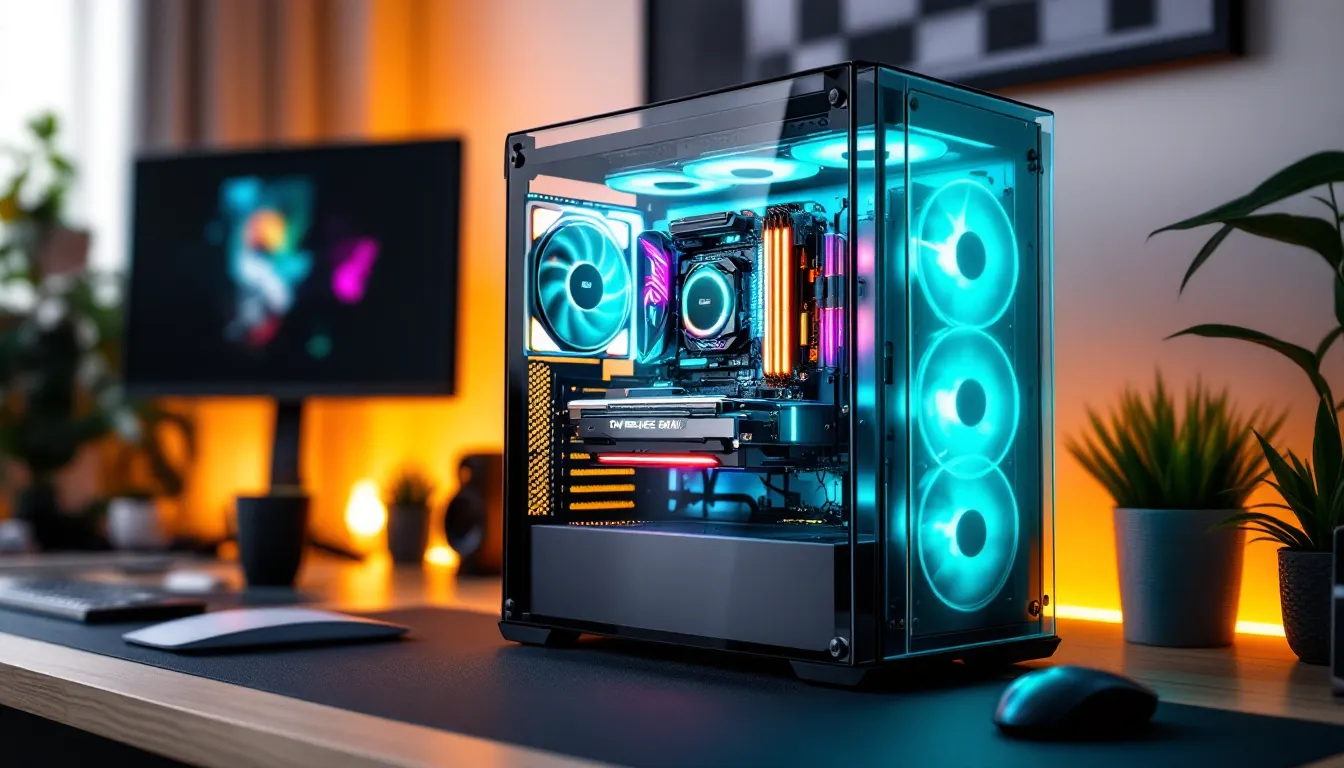

Building a gaming PC used to mean hours of research, compatibility headaches, and the constant fear you’d forgotten a crucial cable. Gaming PC kits changed that equation. These curated component bundles give you everything needed for a complete build without the guesswork, and they’re hitting their stride in 2026 as manufacturers fine-tune their offerings around the latest hardware generations.
Whether you’re stepping up from console gaming or replacing an aging rig, understanding what separates a solid kit from a parts-bin lottery matters. This guide breaks down what’s actually in these kits, how to pick one that matches your performance targets, and what you need to know before you start screwing components into a case.
Key Takeaways
- Gaming PC kits offer pre-vetted component compatibility and eliminate assembly markups of 15-25% compared to pre-built systems while maintaining customization flexibility.
- Allocate roughly 40-45% of your gaming PC kit budget to the GPU, 20-25% to the CPU, and prioritize avoiding cheap compromises on PSU and motherboard that limit future upgrades.
- Modern gaming in 2026 requires 32GB of DDR5 RAM as the comfortable baseline, with VRAM utilization in AAA titles like Avatar: Frontiers of Pandora exceeding 10GB at ultra settings.
- Match your gaming PC kit to your monitor’s resolution and refresh rate: 1080p needs RTX 4060 tier ($700-1,000), 1440p requires RTX 4070 Super territory ($1,200-1,600), and 4K demands RTX 4080 Super or better ($2,000+).
- Critical assembly mistakes to avoid include CPU cooler clearance over RAM, GPU length verification against case capacity, undersizing your PSU by 200W+, and inadequate case airflow that causes CPU thermal throttling.
- Verify component manufacturer models, warranty coverage (5+ years on PSU, 3+ on GPU/motherboard), and check actual reviews from builders before purchasing to avoid red flags like no-name PSU brands or vague specs.
What Is a Gaming PC Kit?
A gaming PC kit is a bundled collection of compatible PC components selected to work together right out of the box. Unlike buying individual parts, where you’re responsible for verifying every specification matches, kits come pre-vetted for compatibility by the vendor.
These kits typically include the core components: CPU, GPU, motherboard, RAM, storage, PSU, and case. Some higher-end offerings throw in cooling solutions beyond the stock cooler, while budget options might skip the GPU entirely, assuming you’ll source your own or upgrade later.
The key difference from a pre-built system? You still assemble it yourself. The components arrive uninstalled, giving you the hands-on build experience and the flexibility to swap parts before or after assembly. Think of it as the middle ground between buying a complete pre-built and sourcing every component individually from scratch.
Why Choose a Gaming PC Kit Over Pre-Built Systems?
Cost Savings and Value
Pre-built gaming PCs carry a significant assembly and labor markup, typically 15-25% over component cost. Kits eliminate that premium while still offering the compatibility assurance you’d otherwise spend hours researching.
You’re also not paying for bloatware, proprietary components, or the aggressive Windows license markups some system integrators add. The savings usually translate to better specs at the same price point, think jumping from a 4060 Ti to a 4070 Super, or adding an extra 16GB of RAM.
Customization and Flexibility
Most pre-builts lock you into specific configurations with limited wiggle room. Gaming PC kits let you swap components before building or choose kits with specific part preferences. Want a different case with better airflow? Already own an SSD you want to reuse? Kits accommodate that flexibility.
You’re not stuck with a single 16GB RAM stick when you know dual-channel matters for performance, and you won’t get surprised by a cheap PSU that’ll force an upgrade when you want more power headroom. Many hardware reviews and benchmarks highlight how component selection impacts real-world gaming, and kits give you control over those choices.
Learning Experience and Future Upgrades
Building from a kit teaches you exactly how your system works. When something needs troubleshooting or upgrading down the line, you’ll know where every cable runs and how each component connects.
That knowledge pays dividends. You won’t need to ship your entire PC back for a simple RAM upgrade or pay a shop $75 to swap a GPU. Future-proofing becomes easier when you understand your motherboard’s upgrade path and PSU wattage limitations from day one.
Essential Components in Every Gaming PC Kit
Processor (CPU)
The CPU handles game logic, physics calculations, and feeds frames to your GPU. For 2026 builds, AMD’s Ryzen 7000 X3D series and Intel’s 14th/15th-gen Core processors dominate kit selections.
Entry kits typically feature 6-core chips like the Ryzen 5 7600 or Intel Core i5-14400F. Mid-range jumps to 8-core options (Ryzen 7 7700X, Core i7-14700K), while high-end kits pack the Ryzen 7 7800X3D or Core i9 chips for competitive framerates at high refresh rates.
Cache size matters more than raw clock speed for gaming. The X3D chips with 96MB of 3D V-Cache consistently deliver 10-15% better 1% lows in CPU-bound titles.
Graphics Card (GPU)
Your GPU renders frames and determines your achievable resolution and refresh rate. It’s the single biggest performance factor for most games.
Budget kits around $800 pair with RTX 4060 or RX 7600 cards targeting 1080p high settings. Mid-range options ($1,200-$1,500) include RTX 4070 Super or RX 7800 XT for 1440p gaming. High-end kits go RTX 4080 Super or RX 7900 XTX for 4K or competitive 1440p at 240Hz+.
VRAM capacity matters for longevity, 8GB struggles in 2026 titles at max textures, while 12GB+ provides comfortable headroom. Modern testing from GPU comparison resources shows VRAM utilization creeping above 10GB in games like Avatar: Frontiers of Pandora and Alan Wake 2 at Ultra settings.
Motherboard
The motherboard connects everything and determines your upgrade path. Kit motherboards range from budget B-series chipsets to premium X670E/Z790 boards.
Key specs to verify: RAM speed support (DDR5-6000+ ideal for AMD, DDR5-7200+ for Intel), PCIe 4.0 or 5.0 slots for GPU and NVMe drives, sufficient M.2 slots, and adequate VRM cooling if you plan to overclock.
Entry kits often include B650 (AMD) or B760 (Intel) boards, which handle most gaming needs fine. Enthusiast kits step up to X670E or Z790 for better power delivery, more connectivity, and PCIe 5.0 support.
Memory (RAM)
Gaming in 2026 requires 32GB of RAM as the comfortable baseline. 16GB still works for many titles but leaves no overhead for Discord, browser tabs, or memory-hungry games like Cities Skylines II or Starfield with mods.
DDR5 is standard now, look for DDR5-6000 CL30 for AMD builds (optimized for Infinity Fabric) or DDR5-7200+ for Intel platforms. Kits should include dual-channel configuration (2x16GB), never single sticks.
Latency matters alongside speed. CL30 or CL32 timings at 6000MHz outperform CL40 at 6400MHz in most gaming scenarios, particularly for frame time consistency.
Storage Solutions
Modern gaming PC kits include NVMe SSDs as primary storage, SATA is effectively dead for new builds. Minimum capacity is 1TB, with 2TB becoming standard in mid-range kits.
Gen4 NVMe drives (7000MB/s reads) provide the best value in 2026, with Gen5 offering minimal gaming benefit for double the cost. Look for drives with DRAM cache (Samsung 990 Pro, WD Black SN850X, Crucial T700) for better sustained performance.
Some kits include a secondary HDD for mass storage, but most builders add that later if needed. Game install sizes have bloated, Call of Duty alone can consume 200GB+.
Power Supply Unit (PSU)
The PSU powers everything and determines system stability. Kits should include 80+ Gold rated units minimum, with wattage 150-200W above your system’s estimated draw for efficiency and upgrade headroom.
Entry builds need 650-750W. Mid-range systems with RTX 4070-class GPUs want 750-850W. High-end kits with RTX 4080+ require 850W-1000W, especially if you’re running a power-hungry CPU.
Modular cabling isn’t optional anymore, it dramatically simplifies cable management. Fully modular beats semi-modular when you’re routing cables in compact cases.
PC Case
Your case determines thermals, noise levels, and how painful the build process becomes. Kit cases range from budget boxes with minimal airflow to premium chassis with optimized fan layouts.
Airflow-focused designs outperform sealed glass showcases for thermals. Look for mesh front panels, support for at least three 120mm fans, and enough clearance for your GPU length and CPU cooler height.
ATX is standard, but Micro-ATX kits save money and desk space without major compromises. Mini-ITX kits exist but reduce upgrade flexibility and increase build difficulty.
Cooling System
Stock CPU coolers included with some chips handle basic operation but struggle under sustained loads. Most kits bundle an aftermarket tower cooler (Thermalright, DeepCool, be quiet.) for $30-50.
Budget builds use single-tower air coolers rated for 150-180W TDP. Mid-range jumps to dual-tower designs or 240mm AIO liquid coolers. High-end overclocking kits include 280mm/360mm AIOs for maximum thermal headroom.
Air cooling is quieter and more reliable long-term, while AIOs provide better CPU clearance and aesthetics. For gaming workloads, a quality air cooler performs within 3-5°C of equivalent AIOs.
How to Choose the Right Gaming PC Kit for Your Needs
Budget Considerations
Set your total budget including peripherals and OS if needed. Gaming PC kits range from $600 bare-bones to $3,000+ flagship builds.
Allocate roughly 40-45% of your budget to the GPU, 20-25% to CPU, and split the remaining across other components. A $1,200 kit should prioritize a $500-550 GPU (RTX 4070 tier) over maxing out the CPU.
Don’t cheap out on PSU or motherboard to upgrade GPU, those compromises bite hard later. A $50 PSU might work initially but fails under load or limits future upgrades. Similarly, a bottom-tier motherboard with poor VRMs throttles CPU performance and restricts RAM speeds.
Gaming Performance Requirements
Match the kit to your monitor’s resolution and refresh rate. A 1080p 144Hz monitor doesn’t need a $2,500 kit, while a 4K 144Hz display will be bottlenecked by budget components.
For 1080p gaming at high-ultra settings and 100+ FPS, target RTX 4060/RX 7600 GPUs paired with 6-core CPUs. Total kit cost: $700-1,000.
For 1440p gaming at high settings and 90+ FPS, you want RTX 4070 Super/RX 7800 XT territory with 8-core CPUs. Kit range: $1,200-1,600.
For 4K gaming or competitive 1440p at 240Hz+, RTX 4080 Super or better with high-end CPUs (7800X3D, i7-14700K) becomes necessary. Expect $2,000+ kits.
Competitive esports titles (Valorant, CS2, League) are CPU-bound and benefit more from fast processors than massive GPUs. Single-player AAA titles reverse that priority.
Future-Proofing Your Build
True future-proofing is impossible, but smart choices extend relevance. Prioritize these factors:
Socket longevity: AMD’s AM5 platform supports upgrades through 2027+. Intel’s LGA1700 is nearing end-of-life with 14th/15th-gen being the last chips.
RAM capacity: 32GB is the sweet spot. 16GB is already limiting in some 2026 titles, and 64GB is overkill unless you’re content creating.
PCIe lanes and M.2 slots: Extra M.2 slots mean easy storage expansion without juggling drives. PCIe 4.0 is sufficient today, but PCIe 5.0 support ages better as GPU/SSD tech advances.
PSU wattage headroom: Oversize by 150-200W beyond current needs. A 750W PSU on a 500W system accommodates GPU upgrades without replacement.
Don’t chase absolute top-tier specs, a $700 GPU delivers 85% the performance of a $1,200 GPU but allows budget for better supporting components. Balance matters more than any single premium part.
Top Gaming PC Kit Options by Budget Level
Entry-Level Kits ($600-$900)
Budget kits target 1080p gaming at high settings with 60+ FPS in most titles. Expect some compromises but solid fundamentals.
Typical specs:
- CPU: Ryzen 5 7600 / Intel Core i5-13400F (6-core)
- GPU: RTX 4060 / RX 7600 (8GB VRAM)
- RAM: 16GB DDR5-5600 (upgrade to 32GB recommended)
- Storage: 512GB-1TB NVMe Gen4
- PSU: 650W 80+ Bronze/Gold
- Motherboard: B650 / B760 chipset
These kits handle esports titles at 144+ FPS easily and run AAA games at 1080p high/ultra between 60-90 FPS depending on optimization. The GPU becomes the bottleneck first in demanding titles.
Upgrade path focuses on adding RAM (16→32GB) and swapping the GPU in 2-3 years. The CPU and platform have headroom for midrange GPU upgrades without bottlenecking.
Mid-Range Kits ($900-$1,500)
The sweet spot for most builders, 1440p capable with excellent 1080p performance and room for high refresh rate gaming.
Typical specs:
- CPU: Ryzen 7 7700X / Intel Core i7-14700F (8-core)
- GPU: RTX 4070 Super / RX 7800 XT (12GB VRAM)
- RAM: 32GB DDR5-6000 CL30
- Storage: 1TB-2TB NVMe Gen4
- PSU: 750-850W 80+ Gold, fully modular
- Motherboard: B650E / Z790 chipset
- Cooling: Quality tower cooler or 240mm AIO
This tier pushes 1440p at 100+ FPS in most games with high-ultra settings. Competitive titles easily hit 200+ FPS. Ray tracing becomes viable with DLSS/FSR at quality settings.
Resources like PC gaming hardware guides consistently rank this performance tier as optimal value for enthusiast gamers who want excellent visuals without diminishing returns.
High-End Kits ($1,500-$2,500+)
Enthusiast territory, 4K gaming, maxed settings, high refresh rates, and content creation capability.
Typical specs:
- CPU: Ryzen 7 7800X3D / Intel Core i9-14900K (8-16 cores)
- GPU: RTX 4080 Super / RX 7900 XTX (16GB+ VRAM)
- RAM: 32GB DDR5-6400+ CL30 (premium kits include 64GB)
- Storage: 2TB NVMe Gen4 primary + optional secondary drive
- PSU: 850-1000W 80+ Platinum, fully modular
- Motherboard: X670E / Z790 premium chipset
- Cooling: 280mm/360mm AIO or high-end dual-tower air cooler
These kits target 4K 60+ FPS ultra settings or competitive 1440p at 240Hz+. Ray tracing performance is smooth with minimal upscaling compromises. Future-proofing is maximized with top-tier platforms and power delivery.
Diminishing returns hit hard above $2,000, you’re paying premium prices for that last 15-20% performance. Only worth it if you have a matching monitor and won’t tolerate settings compromises.
Step-by-Step Assembly Guide for Your Gaming PC Kit
Preparing Your Workspace and Tools
Clear a large, flat surface with good lighting, dining tables work perfectly. Avoid carpet if possible (static risk), or use an anti-static wristband grounded to your case.
Essential tools:
- Phillips-head screwdriver (magnetic tip helps)
- Zip ties or velcro straps for cables
- Flashlight or headlamp for case interior visibility
Optional but useful: needle-nose pliers for stubborn cables, thermal paste (though most coolers include pre-applied paste), and cable extensions if aesthetics matter.
Unbox all components and verify contents against packing lists. Check for obvious shipping damage before starting, dealing with RMAs mid-build sucks.
Installing the CPU and RAM
Start with the motherboard outside the case on its box for easy access.
CPU installation:
- Lift the CPU socket lever (AMD) or remove the protective cover (Intel)
- Align the CPU using the gold triangle marker, force is never required
- Gently lower the CPU into the socket
- Close the retention mechanism (lever for AMD, bracket for Intel)
RAM installation:
- Unlock RAM slots by pushing clips outward
- Align notches on RAM sticks with slots (they only fit one way)
- Press firmly on both ends until clips snap into place
- Install in slots 2 and 4 (A2/B2) for dual-channel, check motherboard manual to confirm
Double-check CPU seating before proceeding. An improperly seated chip causes no-boot issues that are frustrating to diagnose later.
Mounting the Motherboard
Install the I/O shield first, press it into the case rear opening until all edges click. Sharp edges are standard: watch your fingers.
Motherboard standoffs:
- Install brass standoffs in the case at positions matching your motherboard holes
- Never over-tighten standoffs or skip them, missing standoffs cause shorts, extras cause flex
- Most modern cases have standoffs pre-installed for standard ATX layouts
Mounting the board:
- Carefully lower the motherboard, aligning I/O ports with the shield
- Start screws at opposite corners to maintain alignment
- Tighten in a star pattern, firm but not gorilla-tight
Leave the side panel off for now. You’ll need access for cables and troubleshooting.
Installing Storage and Graphics Card
NVMe installation:
- Locate M.2 slot (usually labeled M.2_1 near CPU)
- Remove securing screw and any heatsink if pre-installed
- Insert NVMe drive at 30° angle, then press flat
- Replace screw and heatsink to secure
Some motherboards have multiple M.2 slots with different Gen4/Gen5 support, install your primary drive in the fastest slot.
GPU installation:
- Remove 2-3 rear PCIe slot covers matching GPU width
- Unlock the PCIe slot latch (small clip on slot’s right side)
- Align GPU with the top PCIe x16 slot and press firmly until the latch clicks
- Secure GPU bracket to case with screws
Don’t connect PCIe power cables yet, route everything in the next step.
Cable Management and Final Touches
Connect power and data cables working from motherboard outward:
Essential connections:
- 24-pin ATX power to motherboard
- 8-pin (4+4) CPU power near socket
- PCIe power cables to GPU (usually 2x 8-pin for midrange+)
- SATA power if using HDDs (NVMe doesn’t need power cables)
- Front panel connectors (power button, USB, audio), check motherboard manual
- Case fans to motherboard headers or PSU
Cable routing:
- Route cables behind the motherboard tray when possible
- Use zip ties at cable management points to prevent sag
- Keep cables away from fans and heatsinks
- Leave some slack for future maintenance
First boot checklist:
- Flip PSU switch to ON (I position)
- Connect monitor to GPU, not motherboard
- Press power button and watch for POST screen
- Enter BIOS to verify all components detected and enable XMP/EXPO for RAM
If nothing happens, reseat RAM and GPU, those are the most common first-time issues.
Common Mistakes to Avoid When Building from a Kit
Compatibility Issues Between Components
Even pre-vetted kits can have edge cases. CPU cooler clearance over tall RAM is the classic trap, verify cooler height and RAM clearance specs before installing.
Another gotcha: GPU length versus case capacity. A 330mm GPU won’t fit in a case with 310mm clearance, especially if you have front-mounted radiators or fans. Check both measurements against kit specs.
BIOS updates might be required for newest CPUs on older motherboard stock. Most kits ship with compatible BIOS, but if your Ryzen 7000 CPU won’t POST on a B650 board, it might need a BIOS flashback update using USB.
Inadequate Power Supply Selection
Undersizing your PSU causes crashes under load or prevents boot entirely. Transient power spikes from modern GPUs can exceed TDP ratings by 50-100W momentarily.
Calculate your system’s power draw, then add 200W minimum. An RTX 4070 system drawing 450W total needs a 650W PSU minimum, though 750W provides better efficiency curve operation and upgrade room.
Cheap PSUs fail catastrophically and potentially damage components. Stick with reputable brands (Corsair, Seasonic, EVGA, be quiet.) rated 80+ Gold or better. That efficiency rating matters for long-term electricity costs too.
Poor Thermal Management
Stock or inadequate cooling throttles performance silently. A CPU hitting 95°C drops clocks to protect itself, costing you 10-20% performance without obvious warnings.
Common thermal mistakes:
- Forgetting to remove plastic from cooler base before mounting
- Installing cooler fan backward (pull instead of push)
- Insufficient case fans (minimum: 2x intake front, 1x exhaust rear)
- Blocking intake with solid panels or tight desk placement
- Over-tightening or under-tightening cooler mounting
Positive air pressure (slightly more intake than exhaust) reduces dust buildup and improves temps. Set front fans at 100%, rear/top exhaust at 70-80% for best results.
Monitor temps during first gaming sessions. CPUs should stay under 85°C under load, GPUs under 80°C. Anything higher indicates mounting issues or inadequate airflow.
Where to Buy Gaming PC Kits and What to Look For
Major retailers and system integrators offer curated gaming PC kits. Newegg runs frequent combo deals bundling compatible components at 5-10% discounts. Micro Center (in-store) provides excellent bundle pricing and free tech support if you hit issues.
Manufacturer-direct options from NZXT (BLD Kit), ASUS, and MSI include warranty benefits and guaranteed compatibility. These cost slightly more but reduce research time.
Amazon offers convenience and easy returns but watch for third-party sellers inflating prices. Always verify sold-by Amazon or authorized dealers.
What to verify before buying:
- Component manufacturer and model numbers (not just generic “16GB RAM”)
- Warranty length and coverage, 5+ years on PSU, 3+ on GPU/motherboard preferred
- Return policy if components arrive DOA or prove incompatible
- Assembly instructions or support documentation included
- Regional pricing differences, sometimes buying components separately beats kit pricing
Check recent reviews from buyers who actually built the kit. Photos of unboxing reveal whether cable quality, coolers, and cases match marketing claims.
Red flags:
- No-name PSU brands (Diablotek, Apevia, generic Chinese units)
- Single-channel RAM configuration
- Missing or vague component specs
- “Gaming kit” without GPU included unless explicitly stated
- Outdated generation components sold at current-gen prices
Compare kit pricing against individual component costs using PCPartPicker. Some “kits” are just bundled inventory sold at list price with no actual discount.
Conclusion
Gaming PC kits bridge the gap between pre-built convenience and custom build flexibility, giving you compatibility assurance without paying assembly premiums. They work best when matched carefully to your target resolution, refresh rate, and budget tier.
The build itself is straightforward if you follow proper procedures, take your time on the first assembly, double-check connections, and don’t force anything. That initial effort pays off in system knowledge and easier future upgrades.
Whether you’re targeting 1080p esports framerates on a budget or 4K ultra settings with money to spend, the right kit gets you gaming faster than piecing together a build from scratch. Just prioritize GPU allocation in your budget, don’t cheap out on PSU or thermals, and verify actual component specs before buying.